In this post, I'll show you how to use the HEALTHCHECK command to verify if your container runs properly.
If you haven't already, I strongly suggest you read the previous post about Docker build and push:

HEALTHCHECK command
The command tells you how to check if your container is operational. Running for you might mean running a background process, listening on a UDP, TCP, or HTTP port, or checking for an accessible file; there are several approaches to ensure your container is in good health. The next line explains command syntax:
HEALTHCHECK --start-period={seconds} \
  --retries={number} \
  --interval={seconds} \
  --timeout={seconds} \
  CMD {command}
| Option | Description |
|---|---|
| start-period | Defines a time frame in which to start the healthcheck process, which is essential when you have a delayed application, such as Monolithic web applications. |
| retries | Sets the number of times a healthcheck will be run after an unsuccessful attempt to set the container to unhealthy. |
| timeout | Defines a time limit for evaluating the healthcheck command. |
| interval | Sets the amount of time to wait before performing the healthcheck command. Healhcheck always runs a command once the container starts up. |
| command | We may use shell commands (for example, curl, nc, grep) or bash scripts to ensure that your container is working. |
Building an image using health check
The Docker image below specifies a Redis database with a time frame of 10 seconds to start, listening on the default Redis TCP port 6379 after the time frame has been set. Redis allows you to check that the server is up and running by sending a PING message and receiving a PONG response, which is fantastic.

FROM redis:latest

RUN printf "sleep 10\n" > /usr/local/bin/redis-server-delayed
RUN printf "redis-server" >> /usr/local/bin/redis-server-delayed

RUN chmod +x /usr/local/bin/redis-server-delayed

HEALTHCHECK --interval=10s --timeout=3s \
  --start-period=1s --retries=10 \
  CMD redis-cli ping | grep PONG

CMD ["redis-server-delayed"]
Delay Redis magic🪄 is created by using the sleep command by making the entrypoint wait 10 seconds before starting Redis with the command redis-server. 😆
It's time to build a new container image and watch how health check works.
docker build -t test-healthcheck -f Dockerfile .
Let's start a fresh container in detached mode with a named image called "test-healthcheck.".
docker run -d --rm --name redis-test test-healthcheck

# the heatlh stats should be starting
docker container ls --filter name=redis-test

# after 10 seconds, the container begins to perform the healthcheck command; let us wait another 2 seconds to get a healthy status.
sleep 12
docker container ls --filter name=redis-test
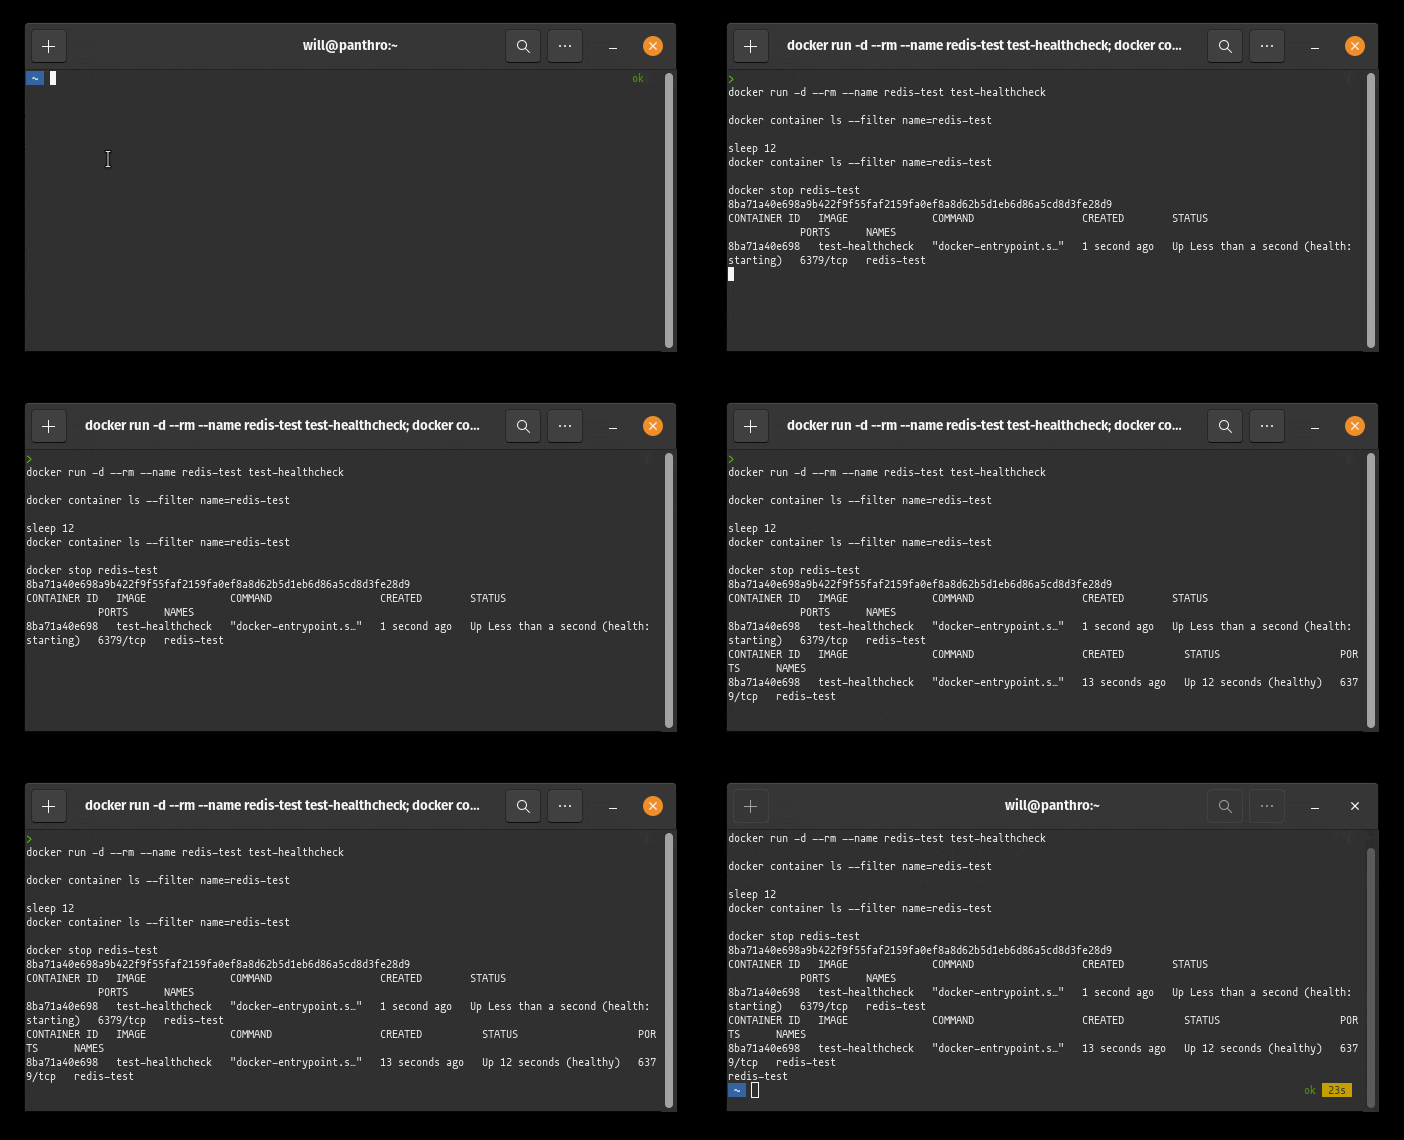
The command execution is shown in the screencast below:

Nice! As you can see, the script check twice to show you the container's health condition, starting and becoming healthy.
A health check real world example
Following is a health check for RabbitMQ, which checks HTTP port 15672 and TCP port 5672. Once both ports begin listening, the container will be identified as healthy.
FROM bitnami/rabbitmq:latest as base

USER root

RUN apt update && apt install -y netcat

RUN apt-get clean autoclean && \
    apt-get autoremove --yes && \
    rm -rf /var/lib/{apt,dpkg,cache,log}/

FROM base as run

USER 1001

ENV RABBITMQ_NODE_PORT_NUMBER=5672
ENV RABBITMQ_MANAGEMENT_PORT_NUMBER=8080

HEALTHCHECK --interval=3s --timeout=3s --start-period=10s --retries=10 \
  CMD curl --fail http://localhost:$RABBITMQ_MANAGEMENT_PORT_NUMBER && \
      nc -z -v localhost $RABBITMQ_NODE_PORT_NUMBER
You can run this image as before using the following command:
docker build -t test-healthcheck-web -f Dockerfile .

docker run -d --rm --name rabbitmq test-healthcheck-web

sleep 15
docker container ls --filter name=rabbitmq

docker stop rabbitmq
At last, you may add health check directly to docker compose, changing the Docker Image specification, or in your Kubernetes yaml file, as seen below:
version: '3.8'

name: test-healthcheck

services:
    slow-redis:
      image: redis
      entrypoint: /bin/sh
      command: -c "sleep 30 && redis-server"
      healthcheck:
        test: ["CMD-SHELL", "redis-cli ping | grep PONG"]
        interval: 10s
        timeout: 3s
        start_period: 1s
Final thoughts
More can be found on my Github repository. For build images, I made many mixed examples.
If you utilize a container image without a health check defined, I recommend looking at the preinstalled packages. Curl and wget can be used to test HTTP connections, while nc may be used to test TCP or UDP connections, as previously shown.
For databases, you may do a connection test with invalid credentials to see whether the database is viable and accepting authentications; this is my approach, and I never use authentic credentials. 😉
There are several ways to guarantee that your container is working. If you don't, you can have trouble scaling or switching containers when utilizing Docker Swarm, Kubernetes, or PaaS solutions. Old containers will be replaced with new ones, resulting in a small or big interruption in service and time is money...

That's it for now; install kernel 🧠 patches and keep this updated. God's blessings 🙏🏿.


