In a recent piece, I discussed Podman, a wonderful Red Hat-powered project that provides a container alternative supported by Kubernetes and a replacement for Docker, read more at the following link.
How to Run Secure Pods with Podman
The podman build commands is entirely compatible with OCI Image Spec, and the instructions are too near to Kubernetes-style and Docker-CLI. However, there are two ways to describe containers:
- podman-compose**, **an implementation of Compose Spec and alternative to docker-compose maintened by community
- podman play kube,an official implementation to create containers, pods or volumes based on Kubernetes YAML.
This time, we’ll create pods with yaml (play-kube) syntax. This method provides the following advantages:
- Instead of shell-script, describe your pods in a yaml file.
- You can generate Kubernetes yaml after you’ve created and ran pods;
Running a basic web pod
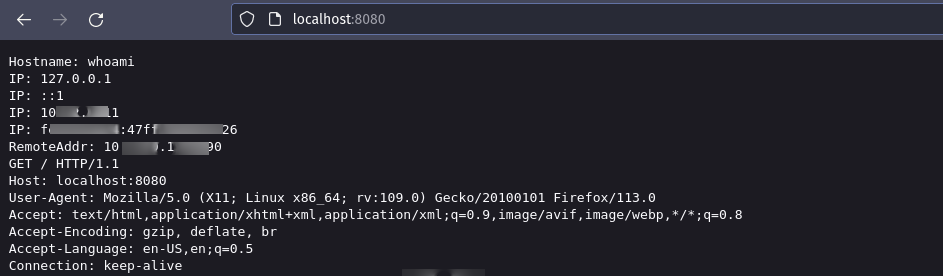
My favorite container image to test is traefik-whoami, which is a basic web application with rich information such as hostname, IP and HTTP request data.
This is a yaml file containing a whoami container written in Kubernetes yaml syntax.
apiVersion: v1
kind: Pod
metadata:
  name: whoami
  labels:
    app: whoami
spec:
  containers:
  - name: whoami
    image: docker.io/traefik/whoami:latest
    ports:
    - containerPort: 8080
      hostPort: 8080
      protocol: TCP
    env:
    - name: WHOAMI_PORT_NUMBER
      value: 8080
  restartPolicy: Never
  dnsPolicy: Default
- kind: defines file format;
- **metadata: **It is useful to define pod names, labels, and data to identify pods;
- spec: define containers, how they operate, and their policies;
- **spec.containers: **a list of containers with their names, utilized images, exposed ports, environment variables, resources, and other specifications;
Now execute the following command to start a pod.
podman play kube whoami.yaml
This pod will listen on port 8080, so feel free to use your terminal’s with curl or web browser.
curl http://localhost:8080
 As previously said, we can produce Kubernetes yaml by running the following command.
# stdout
podman generate kube whoami

# file
podman generate kube whoami > /tmp/pod.yaml
This is the Kubernetes pod yaml file that was generated, save it as /tmp/pod.yaml.
# Save the output of this file and use kubectl create -f to import
# it into Kubernetes.
#
# Created with podman-4.4.4
apiVersion: v1
kind: Pod
metadata:
  creationTimestamp: "2023-05-19T11:59:11Z"
  labels:
    app: whoami
  name: whoami
spec:
  containers:
  - env:
    - name: WHOAMI_PORT_NUMBER
      value: "8080"
    image: docker.io/traefik/whoami:latest
    name: whoami-whoami
    ports:
    - containerPort: 8080
      hostPort: 8080
    resources: {}
  hostname: whoami
  restartPolicy: Never
status: {}
Unfortunately, no update command exists, such as** kube apply -f whoami.yaml**, which we used in Kubernetes. To down pods, use the following command:
podman play kube --down whoami.yaml
If you’re looking for a practical introduction to Kubernetes, go to the following link first:
It’s time to run our generated Kubernetes yaml, run the following command:
Remember to down 🔻 pods before running the following command and save the created pod file yaml.
kubectl appy -f /tmp/pod.yaml
The pod will be deployed and started at port 8080 by Kubernetes this time. So you can double-check connection.
 Now we’ll take pods down again and construct something new with multiple pods, run following command:
kubectl delete -f /tmp/pod.yaml
Multiple database pods
This time we will run multiple database pods with Adminer to test connectivity between pods.
Take a look at the following yaml file, which contains three pods: PostgreSQL, MariaDB, and Adminer:
apiVersion: v1
kind: Pod
metadata:
  name: databases
  labels:
    db: databases
spec:
  containers:
  - name: mariadb
    image: docker.io/mariadb:10.6
    env:
    - name: MARIADB_USER
      value: foo
    - name: MARIADB_PASSWORD
      value: bar
    - name: MYSQL_ROOT_PASSWORD
      value: bar
    volumeMounts:
    - name: mariadb
      mountPath: /var/lib/mysql
    resources:
      limits:
        memory: "1Gi"

  - name: postgresql
    image: docker.io/postgres:15
    env:
    - name: POSTGRES_USER
      value: foo
    - name: POSTGRES_PASSWORD
      value: bar
    volumeMounts:
    - name: postgresql
      mountPath: /var/lib/postgresql/data
    resources:
      limits:
        memory: "1Gi"

  - name: adminer
    image: docker.io/adminer
    ports:
    - containerPort: 8080
      hostPort: 8080
      protocol: TCP
    env:
    - name: ADMINER_DESIGN
      value: dracula
  restartPolicy: Never
  dnsPolicy: Default
  volumes:
  - name: mariadb
    emptyDir:
      sizeLimit: 500Mi
  - name: postgresql
    emptyDir:
      sizeLimit: 500Mi
Let’s take a quick look at the Kubernetes yaml syntax.
- kind: defines file format;
- metadata: It is useful to define pod names, labels, and data to identify pods;
- spec: define containers, how they operate, and their policies;
- spec.containers: a list of containers with their names, utilized images, exposed ports, environment variables, resources, and other specifications;
- containers.resources: used to set a resource restriction such as memory RAM and CPU
- volumes: define persistent storage data to be utilized by pods;
- volumeMounts: provide the directory that will be mapped to the persistent storage;
The only pod that will expose a port will be Adminer at port 8080, enter the following command to run pods:
💡 Remember to name the file adminer.yaml
podman play kube adminer.yaml
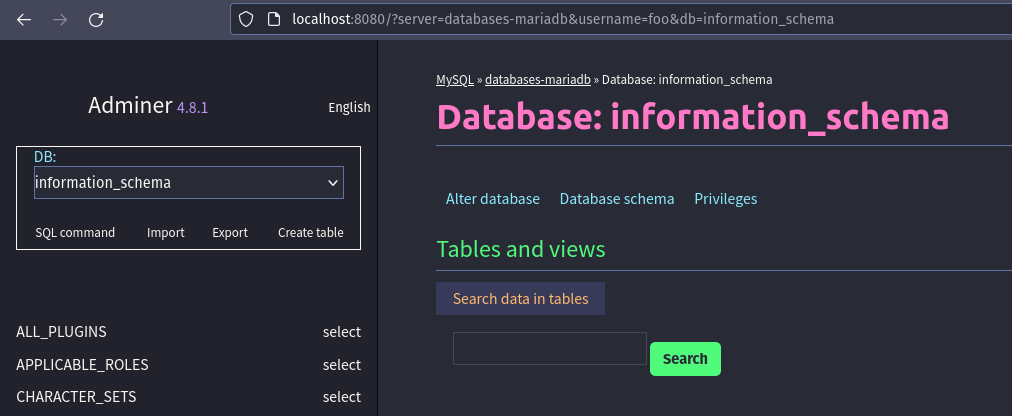
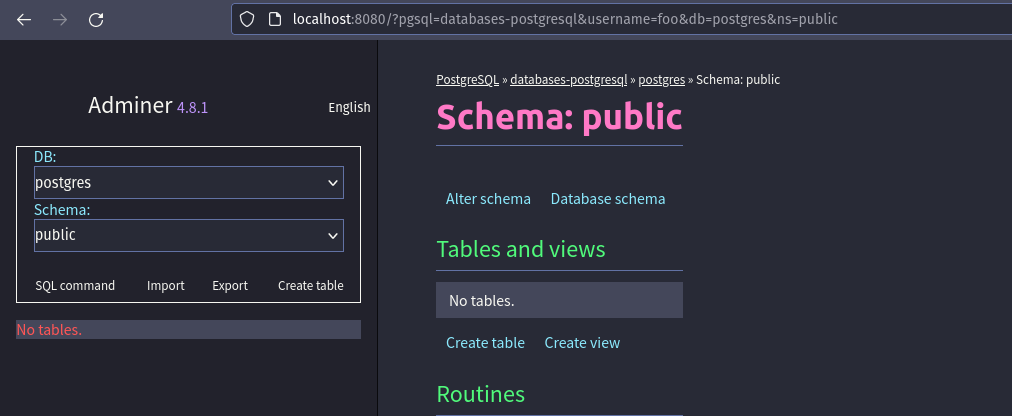
Now that the Adminer pod is up and running at port 8080, you may login to any database using the super secret credentials:
DatabaseHostUsernamePasswordmariadbdatabases-mariadbfoobarpostgresqldatabases-postgresqlfoobar
Now it’s time to test connection.
 You may produce and run yaml for your homework by using the commands kube generate and kubectl apply:
When podman generates a Kubernetes YAML, it is expected to have PersistentVolumeClaim created, thus create a file named databases-pvc.yaml.
apiVersion: v1
kind: PersistentVolumeClaim
metadata:
  name: mariadb
spec:
  accessModes:
    - ReadWriteOnce
  volumeMode: Filesystem
  resources:
    requests:
      storage: 500Mi
---
apiVersion: v1
kind: PersistentVolumeClaim
metadata:
  name: postgresql
spec:
  accessModes:
    - ReadWriteOnce
  volumeMode: Filesystem
  resources:
    requests:
      storage: 500Mi
Now we can execute this script on a Kubernetes-powered test pod (postgres, mariadb, and adminer).
podman kube generate databases > /tmp/databases.yaml
podman kube play --down adminer.yaml
kubectl apply -f databases-pvc.yaml
kubectl apply -f /tmp/databases.yaml
Kubernetes uses a single DNS for each, rather than a hostname alias for each container (databases-mariadb, databases-postgresql) such podman does, you must use host “databases” to access PostgreSQL or MariaDB, wonderful 🥲.
That’s all, folks.
If you prefer, you can clone the repository
With this work, we learnt how to use podman to describe pods and build Kubernetes YAML.
Podman is constantly updated; some features may not be completely compatible with Kubernetes, and you might face some unexpected instructions when generating your YAML; however, it is important to note that Podman is a hand on the wheel, allowing you to test your pods locally and save time writing deployments.
Have a wonderful weekend, and God bless you 🙏🏿 and keep your kernel 🧠 updated